They say that one becomes an “expert” at something after working on the subject for around 10,000 hours. The concept is that if you obsess over something long enough, you are bound to know more than the guy or girl next door. Well, I wouldn’t consider myself an “expert” on BBQ ribs (or any other BBQ for that matter) and probably never will, but I have probably clocked more than 10,000 hours in the last few years cooking, reading and talking about ribs, pulled pork, chicken and brisket so I have a good start. In terms of BBQ education, this year has been a cram session. We just launched Ribs! for iPhone and Android with Dr. BBQ. Ray was nice enough to share some of his secret, award winning recipes through this app and we recreated, photographed and studied each one. We also had the opportunity to meet some of the best BBQ cooks in the world at events like the Kingsford Invitational. At these events we got to pick the brains of legends like Chris Lilly, Harry Soo, Tuffy Stone and Brad Orrison. Not only are these guys at the top of their games, but they are so down to Earth and all love to share whatever they have learned about BBQ with whoever asks. What is cool about meeting these experts is realizing that they too are always on the quest to learn how to improve their ribs, pulled pork, chicken and brisket recipes. They have well exceeded 10,000 hours, but the quest for ribs perfection continues.
This article is meant to be a living article that I will use to share the knowledge I learn from smoking, asking and studying my way through at least an undergraduate degree in BBQ ribs. I hope that you will read it, get the courage to try it and then get hooked and come back to share what you have learned. Together, we will fill every neighborhood with delicious smoke (insert sinister laugh)! Ready to start your education? Sharpen your pencil and meet me below…
Choosing BBQ Ribs
There are two common cuts of pork ribs, baby back and spare ribs. If you look at both in the meat section, it is pretty obvious to tell the two apart (hint, the baby backs are the smaller ribs). Baby back ribs are much smaller in size and are cut from the top of the rib cage, above the spare ribs. The reason they are called “baby” (other than size) is because they are generally cut from the smaller market sized pigs, rather than adult hogs. Baby back ribs are also sometimes labeled “loin ribs”, “back ribs” or “Canadian back ribs”, depending on where you shop for meat. Whatever they are called, you will know them because they are much smaller and more curved than the spare ribs. Baby back ribs cook faster than spare ribs, so they make the perfect choice for beginner BBQ. Look for them on sale and freeze a few racks for your upcoming experiments.
Spare ribs are the huge dinosaur-looking ribs you see in the meat case. Spare ribs consist of the actual ribs and also a section of cartilage called the rib tips. St. Louis style ribs are spare ribs with the rib tips removed. Pound for pound, spare ribs contain less meat and more fat than baby back ribs. The name “spare ribs” is thought to have originated because they contain less meat once removed from the hog. Ok, enough about anatomy lets start talking about how to make them into delicious bbq ribs.

Rubs
The next stop on your journey to ribs perfection is in the spice aisle of the supermarket. Most every BBQ cook uses some sort of rub on his or her ribs. Each region of the country is known for a particular flavor profile that they bring to the ribs, but most rubs start with some combination of brown sugar, paprika, salt and pepper. This combination produces a sweet and spicy contrast that is popular with most rib lovers. From that base of flavors, we can go hog wild (get it?) with additional flavors. This is the fun part of BBQ, the experiment of flavors that will ultimately produce that “secret” rub ingredient that makes your ribs stand head and shoulders above the neighbors at the next cook off. Cumin and chili powder can bring in some extra bold smoky flavor profiles. One interesting thing to note; if you watch any of the BBQ competitions on TV, you would think that those guys all prefer a really elaborate rub on their ribs. For competition, absolutely, they are trying to create a really bold one-bite product for the judges. That one bite has to “pop” in the judge’s mouth with bold and unique flavors to give that BBQ cook a way to stand out from the competitors. However, most of the professional BBQ cooks I have talked to admit that they actually prefer a very basic rub when they cook their ribs at home or even in their restaurants. In fact, a combination of simple kosher salt, fresh black pepper and garlic powder seems to be the most popular simple rubs. Personally, I start with a simple and traditional base and then start adding a teaspoon of this or that, whatever is available in the cupboard, and taste as I go. Here is a good starter rub that you can use to get going until you find what flavors you prefer. Done with the dry stuff? Ok, lets move on to the wet ingredients.

To Sauce or Not
Now we come to one of the most controversial topics, to sauce or not to sauce. BBQ fans will debate this about as passionately as a Ford versus Chevy debate in the Talladega infield. In general, there are 4 main BBQ styles and regions in the United States. Each region has their preferences. Texas is known for their beef, but they generally like their BBQ dry or with a tomato based (but not sweet) sauce on the side. Memphis seems to fall in either the dry or wet category, depending on the restaurant. Wet ribs fans prefer to “mop” their ribs during and after cooking with a mild and sweet BBQ sauce while others serve them dry, with a dry rub that is applied before and after smoking. Kansas City style ribs are hit with a savory and sweet rub and then a sticky, thick and sweet sauce is slathered onto the racks at the end of cooking to create a nice glaze. Carolina style ribs are served with a thinner sauce that is usually vinegar and mustard based. As for me, I live in Florida and I prefer the kind of ribs we tend to get at the traditional Southern roadside stands. Dr. BBQ has the recipe for these types of ribs in his Ribs! app for iPhone. Look at the “Old Skool BBQ Ribs” recipe in that app. Simple and delicious. Unless you have a strong preference, I suggest tying them all. How can you go wrong with that experiment?? Ok, now it is time to move on to the hardware we will need to smoke these delicious ribs.
Smoke, Supporting Actor, Not the Star
Before we get to the hardware side of this equation, I wanted to talk a little bit about smoke amounts. I just attended the Kingsford Invitational, which is essentially the World Series of BBQ. The top BBQ cooks from around the Nation were there and I learned a lot from talking to them. Time after time, each BBQ cook said the most common rookie mistake when starting out is the use of TOO much smoke. As a matter of fact, when you walk around a competition like that in the middle of their long cook times, you will see just a hint of smoke coming from their stacks. The reason for this is pretty simple once explained. First, meat only absorbs smoke for the first 2 hours or so. After that, the meat is “sealed” and will no longer take in any smoke. Applying heavy smoke after that only results in the smoke residue sitting on the outside of the meat. When you bite into BBQ ribs that have been heavily smoked for too long, the residue is too overpowering and creates an unpleasant experience in your mouth. Smoke should be just another ingredient in your ribs, not the main flavor. Smoke plays a supporting role in this production.
Do I need a Smoker?
Now we start to get into the investment side of this new hobby of yours. Depending on your budget, you can start creating delicious BBQ ribs on a dedicated smoker or just use the grill you already have. To me, the easiest way (especially if you are married and want to keep the peace) is to start with what you have available. For me, that was a Weber Kettle. Not only are kettle grills great low-cost grilling purchases, they can easily be used with the coals offset to cook at the “low and slow” pace needed to coax the most tenderness out of our ribs. Simply pile the coals to one side and then add some wood chips over the hot coals right before you put on your ribs. Have a gas grill and don’t want to buy a charcoal grill? No problem, just light half of the burners, make a smoke pouch and cook your ribs on the unlit side of the grill. I use the Weber Summit S-470 Gas Grill
with a dedicated smoke box burner. The dedicated smoke box with separate burner makes it really easy to create some great smoke using wood chips. The downside to using a grill for low and slow is that you may be fighting to keep a low temperature of the amount of time needed to create great barbecue ribs. For that reason, it is hard to beat a dedicated smoker if you really want to get serious.

A dedicated smoker is just that, dedicated to the art of slow and low cooking. They are designed to maintain low temperatures for a long period of time. Smokers use coal, gas, wood pellets or electric to create heat and then wood is added to the fuel source to smolder and impart that great smoke flavor to the meat. Some smokers, like the Big Steel Keg (my choice at the moment) are designed with the fuel and smoke source located directly below the meat while others have an offset fire box that feeds smoke into a separate chamber where the meat is located while cooking. Another great low cost project is to build your own dedicated smoker out of a 55-gallon drum. These are called Ugly Drum smokers, the instructions can be found here and they make a fun project. Another really fun project is to build a table-top smoker our of a Weber Smokey Joe tailgating grill and an aluminum pot. I just built one and it is now my most used smoker. Here are my detailed instructions on how to build a mini smoker. We’ll go in to a more thorough review of smoker options soon and update this page with links once we do. There are a lot of great options out there that deserve their own dedicated review. Again, we suggest starting with what you have available and then upgrade as you get more in to barbecue (you will get hooked).
Other Essential Hardware
One of the most important aspects of slow and low cooking is the ability to easily maintain a temperature of 225 – 275 for up to 6 hours. In order to do so, the smoker needs to be able to precisely control the amount of oxygen fed to the burning coals. The easy way to ensure that you will spend all day fighting temperatures is to open the lid periodically. Every time you do so, the fuel source gets a fresh blast of oxygen, causing spikes in temperature that you will be fighting all day. To get over the urge to check on things often, you should invest in a good remote BBQ thermometer that monitors both the temperature of the meat and the temperature of the smoker pit. I don’t use the meat probe when I am cooking my BBQ ribs, but the smoker thermometer is invaluable. Also remember that the lid thermometer on your smoker is usually located inches above where the ribs will actually sit. This means that the temperature you are cooking your ribs at is most likely different than the temperature shown on the lid thermometer. We recommend the Maverick Wireless BBQ Thermometer. It has a probe that clips on to the grates of the smoker or grill right next to the meat. You can monitor it from your hammock while you sit on your margarita and never have the urge to open that lid to blast the fire with air. Just a little warning, be prepared to buy extra probes if you do a lot of cooking with the thermometer. Probes for any remote thermometer tend to short out every few months. Frustrating, but they all seem to do it, so just be prepared (about $10 to replace). A good, instant read meat thermometer is also good to have around. The Thermapen is by far the best and is well worth the $100 because it will never need to be calibrated. Ribs will be about 190 degrees on an instant read thermometer when they are done.

Next, you will want to get a good supply of wood pieces or chunks to smoke with. I like chunks better than chips, but that is my preference. The chunks last a little longer and I don’t have to soak them. If you use chips, soak them in water for at least an hour before you throw them on your fuel source. Skip the soaking on the chunks because the water isn’t going to penetrate the wood far enough to make a difference any way. As for wood type, a lot of BBQ rib cooks like the sweeter smoke produced by fruitwoods like apple and cherry. Hickory is an easy wood to get ahold of in most of the country and makes for a great rib smoke as well (but use more sparingly than the fruit). Personally, and according to some of the expert BBQ cooks I have asked, I think mesquite is too strong for pork and will overpower the ribs so I stay away. Bottom line; use whatever wood is easy to obtain in your area. I love apple wood because I think it compliments the ribs well. It can be found in a lot of places online.
BBQ Ribs, Step by Step
Step 1– Peel and trim. Whether you choose spare ribs or baby back ribs, there is a membrane on the back that needs to be removed. Why? When cooked, this membrane turns to a leather-like consistency and it hard to choose. It also creates a barrier that makes it difficult for rubs, smoke and sauces to penetrate into the meat. Just trust me, remove it. It is kind of a pain and each rack is different, but start at one edge of the rack and use a paper towel between your fingers to get a grip. For even more stubborn racks, you may need a knife to pry up the edge of the membrane to get a grip. This photo shows the process and how thin the membrane is that we are talking about.
 Now that the membrane is gone, spare ribs have a flap of skin and fat on the back. Trim that off to the bone and discard. At this point, you can also trim any large pieces of fat off of the meat if you wish, but not all (fat tastes good, but you don’t want huge bites of it either).

Step 3 – Play with Fire. While your rack of ribs sits in the cooler absorbing some of that great rub flavor, we should go ahead and get some heat going. We are talking about lighting the fuel source (charcoal, gas, electric), not the wood at this point. Light your smoker or set up your grill for indirect heat cooking. Our target is 250 – 275 degrees. Every grill and smoker is different, so it is impossible to cover this step in specific detail. Just make sure you give the pit or grill enough time to “settle” in to a temperature with the lid closed. Remember also that the temperature of the cooker will probably drop 5 – 10 degrees when you add the meat, so aiming slightly higher for the initial temperature works on some smokers.
Step 4 – Add the Wood. Now that the pit has had time to settle in to temperature, it is time to add the wood and then the meat. Add the equivalent of about 4 pieces of 3 inch square chunks of wood to the top of the burning fuel.
Step 5 – Smoke that Swine! Right after you add the wood, it is time to put the meat on the smoker. Add the ribs (meat side up) to the indirect side of the grill or smoker and place your probe thermometer as close to (not touching) the meat as possible and then close the lid. That is it for now. Go relax and don’t open the lid!
Step 6 – Add More Wood If Necessary. Monitor your smoke stack over the next 2 hours. You don’t need a lot of smoke billowing out of the stack to smoke those ribs, but you may want to add more wood. If smoke stops altogether during the first 2 hours, add about half as much wood as you added at the beginning. Like I mentioned before, at about 2 hours into the cook, your ribs have sealed and are not going to take on any more smoke so don’t over-do it!
Step 7 – Spritz or Mop or Not. Here is another debate you will find in the BBQ world. Should you mop or otherwise baste your ribs during cooking? I personally like to spritz my ribs with a squirt bottle. I combine equal parts wine vinegar, apple juice and soy sauce in a CLEAN squirt bottle. I then wait until the ribs have cooked for about an hour and a half and then squirt them down to get them moist with the mixture then close the lid. I’ll repeat that every 45 minutes to an hour until they are done to keep them moist. But some people don’t baste at all. Try it both ways and see if you can tell a difference.

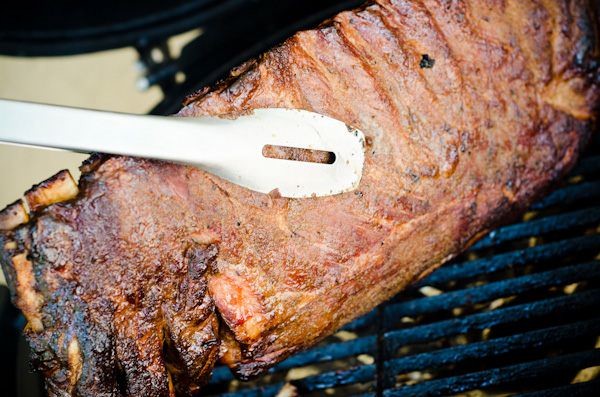
Step 8 – Are They Done Yet? As a GENERAL rule, baby back bbq ribs will take about 3 to 4 hours and spare ribs about 5 to 6 hours at 250 – 275 degrees. Start checking at the low end of that scale. The easiest way to check if ribs are done is to use a toothpick. If a toothpick slides through the meat in between the bones with little effort, they are probably done. You can also pick up one side of the rack with tongs, allowing the ribs to fold. If the surface cracks, that is another indication they are done. If you REALLY want to make sure before you get a feel for it, just cut off a rib and try it, I won’t tell anyone!
Step 8.5 – Get Saucy. If you have determined you are a dry ribs fan, then obviously skip this step. If you are going to use a sauce, now is the time to apply so that it has enough time to create a great glaze on those bbq ribs. Apply the sauce to the ribs with about 30 minutes of cook time to go and then cook the remaining time with the lid closed.

Once they are done, serve or eat the whole mess of bbq ribs yourself. That was easy, right? I know it is intimidating at first, but once you cook a few slabs of ribs you too will get the bug and have a hard time stopping your obsession. Think about it. Barbecue is the art of taking a really tough cut of cheap meat and cooking it long enough to make it wonderful. I don’t know about you, but I think that is a pretty cool challenge to undertake on a weekend. Once you get the hang of it and create what is to you the perfect rack of BBQ ribs, make sure you let us know what we can do to make it easier on the next soon-to-be-obsessed barbecue student!
Leave a Reply